Automating Fortify scanning in Azure DevOps
Fortify is a really useful tool for scanning your code and reducing the chance of bugs or vulnerabilities making their way in to production. They even provide Azure DevOps tasks for integrating submitting your code in to your build pipelines.
The documentation for how to actually set the whole process up is pretty poor to non-existent so below is what I did to get it working which I hope will be useful to someone else.
Install Fortify in to your Azure DevOps Tenant
First thing is to install the Micro Focus Fortify integration in to your Azure DevOps Tenant. I won’t cover how to do this here as the general process is well-documented.
Get the ReleaseId for your application
- Create your application and create a release within it.
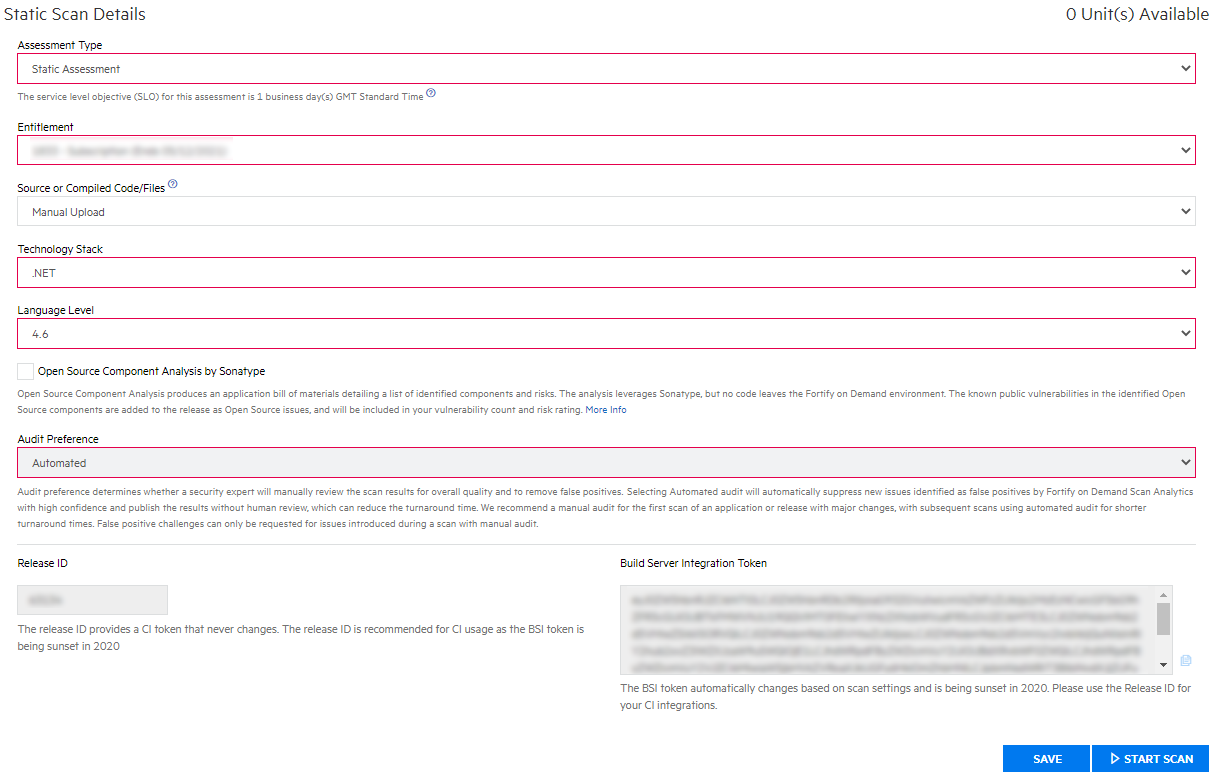
- Against the release, click
Start Scanand selectStatic. - Complete the form, including selecting your Technology Stack, Audit Preference, etc.
- Copy the Release ID from the bottom of the page, you’ll need this later.
Creating Fortify service connection
The first thing we need to do is set up a service connection between Azure DevOps and Fortify.
Retrieve Fortify API Keys
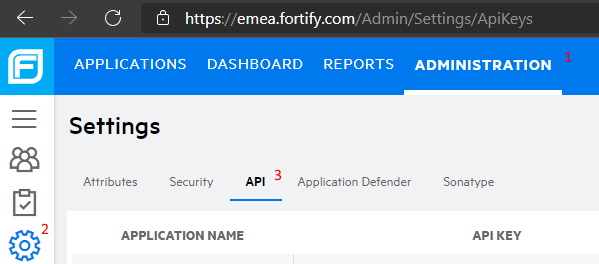
In the Fortify portal, go to Administration, then Settings, then API, as below:
Click Add Key, enter a name for the key. The minimum role required is Start Scans:
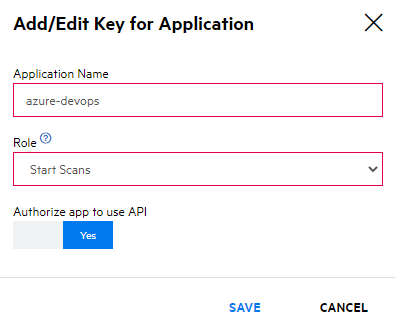
You’ll need the API Key and the API Secret that will be displayed. You can only see the secret once, so make sure you copy it before closing the dialog.
Create connection in Azure DevOps
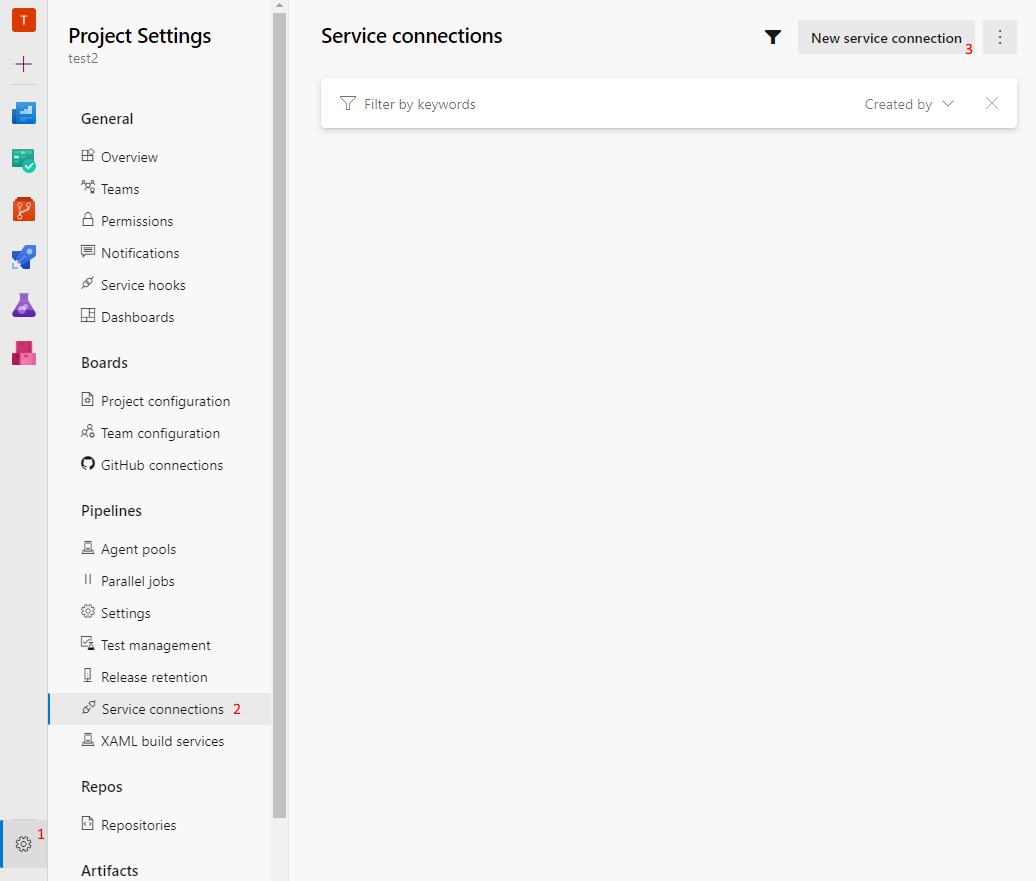
In your Azure DevOps project, go to Settings, then Service Connections, and click New Service Connection. In the list, you should see an entry for Fortify.
- Complete the New Connection dialog.
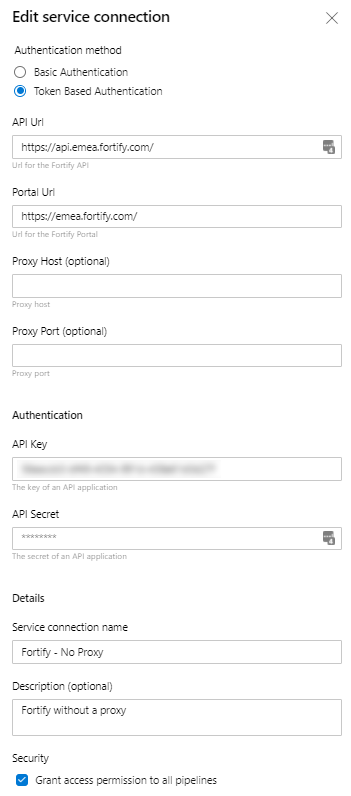
- The API and Portal urls were the values I couldn’t find in their documentation so these may be different for you.
- Put the API Key and API Secret from the Fortify portal in the Authentication fields. Be sure to set the Authentication method to
Token Based Authentication.
Click Add.
Now that you have added the service connection, we can proceed to creating our pipeline.
Creating YAML pipeline
Create a new YAML build pipeline and add the following:
trigger:
- release/*

pool:
  vmImage: 'windows-latest'

variables:
  ArchiveFileName: '$(build.buildId).zip'
  ArchiveLocation: '$(build.artifactStagingDirectory)/zipped/'
  pipeline.releaseId: '$(ReleaseId)'
  SourceLocation: '$(Agent.BuildDirectory)\s'

steps:
- task: ArchiveFiles@2
  displayName: 'Archive $(SourceLocation)'
  inputs:
    rootFolderOrFile: '$(SourceLocation)'
    archiveFile: '$(ArchiveLocation)$(ArchiveFileName)'

- task: fortifyvsts.hpe-security-fortify-vsts.build-task-fortify-on-demand-static.FortifyOnDemandStatic@7
  displayName: 'Run Fortify on Demand static assessment on $(ArchiveLocation)'
  inputs:
    FortifyProjects: '$(ArchiveLocation)'
    ReleaseId: '$(pipeline.releaseId)'
    FodConnection: 'Fortify - No Proxy'
    EntitlementPreference: 1
    InProgressScanActionType: 2
    RemediationScanPreference: 2
    PolicyFailAction: 0
The above will zip up the artifact staging directory which is where Azure DevOps will have cloned your code, then submit it to Fortify.
Add a Variable called ReleaseId and add the Release Id from Fortify.
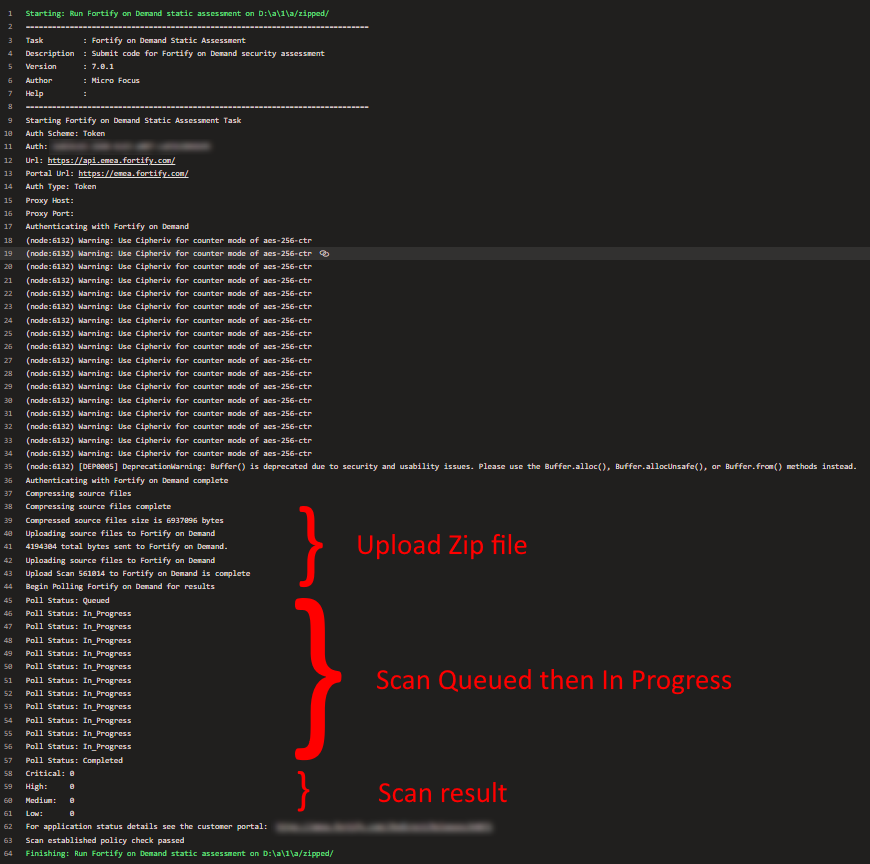
Click Save and run your pipeline, you should see the following in the output
 Notes
Notes
- If your code base is large or the scan is in the Queued state for a long time, the scan may take longer than the maximum 60 minutes Azure DevOps allows a task to run. If this is the case, I suggest setting the Error preference to warn rather than fail so you can tell the difference between the scan wait timing out and another error.
- I am uploading the source code here, but you can also upload the compiled code. However, I have found that the relevance of the results is a lot better when uploading raw source code so would suggest doing this if you can.
End
You should now have a pipeline that will submit your code to Fortify based on the triggers you have defined in the YAML file. If there are any inaccuracies in this guide or you have suggestions for improvement, please open an issue or submit a PR.